| 049 | Walking Easier - Steps | 2009-02-25 |
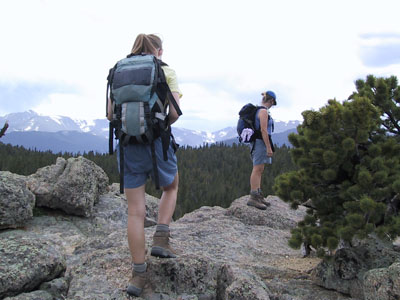
Walking trails is more difficult than walking on a paved sidewalk. I once had a teenager on a backpacking trip exclaim that he "could walk forever on flat pavement." Maybe he could, but he was indeed having issues on rolling trails. Over the years I have seen so many people trying to walk on trails, who were having trouble as evidenced by their facial expressions. Over the years I have had my share of trouble walking trails. If climbers, backpackers, hikers, mountaineers had good memories they would only go out once. The pain of learning somehow miraculously transforms into nostalgia for the ages. In the end the joy outweighs the pain, and keeps us coming back for more.
Part of the problem is that we think we know how to walk. Many think that walking on a trail is just like walking around in the mall, they just don’t have as many benches. But the trail is different, it makes us adjust our stride to the uneven surface. We step forward, backward, and to each side. The trail is ever changing for the length of the most paths.
Some hints to improve your walking skills:
Natural Gait - Walk your gait. As the terrain looks more difficult (obstacles or hills), shorten your stride. Practice keeping your foot landing straight - not toe in or out.
Look Ahead - Watch the trail in front of you, oh ten or twelve feet away, and let your mind do it’s computing and as you decide the best way to step over an object. You will probably have to train it a bit, but after a short while the calculating should become second nature. For clarification you don’t need to stare at anything, look around, just bring your focus back to the ten foot rule to help you read the trail. If you are just looking at your feet you have basically all ready passed that obstacle.
Foot Elevation - Raise your foot just as high as you need, no more. If a rock crosses the trail and you decide to step over it, raise your foot, oh say an eight of an inch higher than you need to clear the obstacle, no more, and step over. Raising your foot any higher only uses more effort. Of course if you are not very accurate in your assessment you might trip if you are an eight of an inch short. I have fallen stepping over an obstacle and have gracefully cleared one by an eighth only to see myself trip on the flat trail. The whole trick to Foot Elevation is to not waste energy.
Lowest Step - Look at all obstacles and find the lowest crossing. Then still follow the Foot Elevation principle.
Step Over - If at all possible do not step on top of the obstacle instead step over it. Step Over keeps you from having to lift your body up then lower it down, instead you are just lifting your leg higher - remember obstacle plus one eighth.
Two Step - Always take two shorter steps instead of one longer one, when given the choice. This technique is especially useful in going uphill. Don’t get caught up making unnatural high steps when with a little thought you could add an intermediate step.
Slow Down - As in downhill, it is easy for your legs to move faster than your legs or your body to move faster than your legs, either way ends in a case of wiping the dirt off where you landed. Generally downhill is harder on your joints than going uphill, so take shorter steps and let your muscles absorb some of the jar.
Relax - Breathe and relax as you are walking. If you are not relaxed, take a deep breath and re-center your focus.
Use the trail time to restore your mind, body, and soul. Be a good steward of the land and know your responsibilities. Soon you will forget the pain.
Happy trails.