| 812 | Helio, the Nemo Shower |
2013-05-22 |

In the summers we spend as much time as possible in the outdoors. In general, we travel to the mountains and live. Few, if any, of the campgrounds or camping areas where we stay have showers. So, if we want to wash the dirt off we have to go to town.
Some of the places where we have found showers are at RV parks, city swimming pools, and laundromats, but these places charge upwards of $5 a piece for the showers. A total of $10 a day for showers adds up quickly when your trip lasts 60 days, we needed a better solution.
Years ago (90's), a company called Basic Designs made a Solar Shower Bag. I was immediately sold on the idea. It worked okay but the water didn't really warm from the sun and the flow was terrible. The other problem was that it was hard to rig the large, gravity fed shower. After the novelty of having an outdoor shower wore off, the bag never left the closet.
The next shower was the Cascade Design Shower Bag which we bought in the early 00's. It was essentially a black, dry bag with a roll down sleeve and a gravity fed hose and nozzle. We liked the idea that you could just heat water on your stove and pour it in the large bag opening. You could get the water temperature just about right, but it still was gravity fed and a pain to set up.
Next, we tried a Zodi shower. This was a rather expensive portable shower. It used a propane burner to heat the water and a battery operated pump for water pressure. We used it one season and that was all. It would take a lot of tinkering to make everything work - especially at higher altitudes.
We returned to using a shower bag, but then saw the small Sea to Summit Pocket Shower. It was inexpensive and simple. You filled the small bag with water and let it drip. We have used the Pocket Shower more than any of the others, but mainly because it was simple to operate and rig. We just ignored the things we didn't like about the bag.

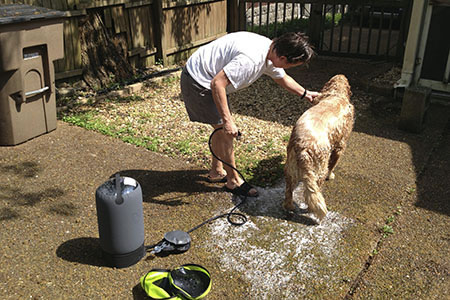
Jake showering
Then, while talking to a long time friend, who is a salesman, he told us about the Helio Shower by Nemo. Next, he dropped by the house and demonstrated the shower for me. It really did have pressure. Then our friend asked if we would use Helio and write a review, we naturally said yes. After all, we were still searching for a usable outdoor shower.
We promised to use the shower before our trip, then if we liked the shower, we would review it. We also wanted to take the Helio on our summer trip and write another review at the end of the summer.
So, the other day, our dog Jake smelt like whatever he had been rolling in and needed a bath, we used the Helios for the first time. We took the shower out of the storage case, added water, pumped, and sprayed. It was really that easy.
A few notes on our first use of the Helio Shower ...
If you haven't heard of Nemo Equipment, they entered the outdoor equipment industry a while back with tents that used inflatable sleeves instead of poles. They have grown and now make a full line of tents and other outdoor products. Nemo makes intelligent gear.
The instructions on the Helio are on the product tag. That's all.
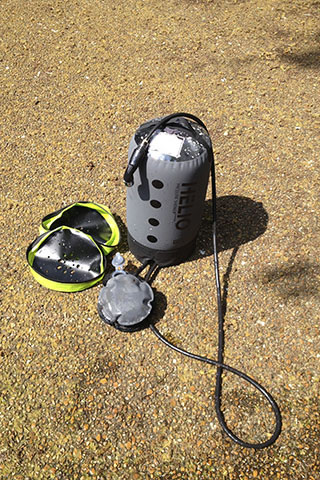
I had to experiment to find the purpose of the two valves on the foot pump. Open the top valve to pressurize the bag. The bottom valve is only used to deflate the ppump for packing.
The top side of the pump is the light gray side.
To fill the bag, I sat it on the ground and poured water into the bag valve or opening - underneath the handle. By lightly holding the handle a funnel forms around the valve and prevents massive spillage.
The bag valve was tricky to shut. I pushed up from underneath the valve. I am sure the process will be simpler with practice. Make sure the valve is sealed before pumping. The bag really has a lot of pressure.
Speaking of pressure, fill the bag with water and pump a few times - 5 to 10, and the Helio produces a constant stream for about 30 seconds. Add a couple more pumps and a strong stream returns. The Helio really has a powerful (for a portable shower) stream.
I filled the bag and ran it until it emptied. The Helio gave me 5 minutes of shower time (!) in 30 to 45 second spurts. I had the adjustable nozzle at full stream.
It was not overly difficult to return the Helio to the storage case. I drained the bag, then coiled the hose on the bottom side of the main bag and then put the pump on top of the hose. Next, I place the case over the bag, hose, and pump. Lastly, flip the case over and finish stuffing the bag inside.
One of the best features of the Helio is that it is made to sit on the ground. You do not need a special place to hang the bag. Any place can be a shower.
Do not store the bag while pressured.
The Helio can be used for showers, washing the dog, household cleaning (outside windows, etc), washing the car, cleaning outdoor gear, rinsing a picnic table, or any project that needs water.

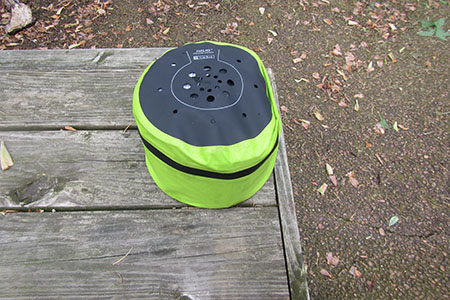
Helio in the case, it is about the size of a volleyball
And a few campground notes ...
Every campground has different rules. Check to see if the Park or facility allow showers. For example, the Tetons allow showers in campsites, but Rocky Mountain does not.
However, Rocky Mountain National Park has a shower stall for shower bags in the Moraine Park Campground.
When camping use odorless lotions, toothpaste, deodorants, shampoos, soaps, repellents, etc.
Always use biodegradable products. A biodegradable soap is still soap. No one wants to drink biodegradable soapy water any more than regular soapy water.
Use special care in areas with bears. Bears have a keen sense of smell.
Shower at least 300 feet from water sources and sleeping areas.
You can get quite clean using water only.
If possible, capture the shower water and dispose of the water in a drain.
Always practice minimum impact camping.
We really liked the Helio Shower. It was a surprise. We look forward to using the Helio this summer and will finish the review at the end of the trip.
Happy Helio Shower trails