| 634 | Grommets | 2012-05-02 |
A few years back we were looking through the gear repair selection on REI and decided to buy a grommet kit. We had never placed a grommet, but needed to do a few modifications to a tarp/tent. For whatever reason, we never got around to even opening the kit. Finally this spring, while Amy was at work, I decided to learn how to place a grommet.
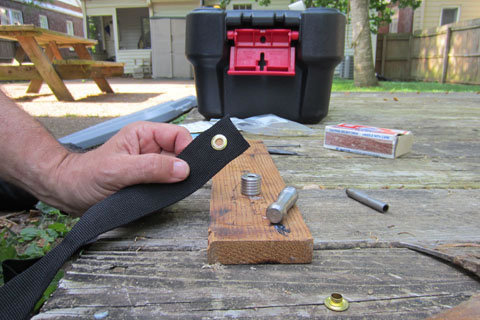
Going to the backyard I found an old piece of webbing for my first attempt. After reading the instructions and familiarizing myself with the pieces of the kit, I started the process.
Using the 'cutter' I tried to make a hole in the webbing for the post of the grommet, but it would not cut through the tough material.
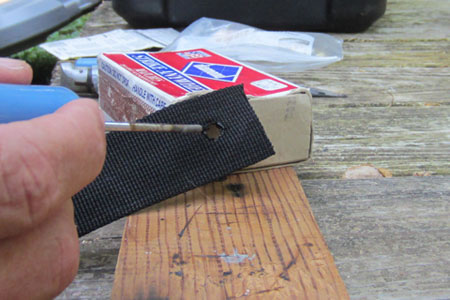
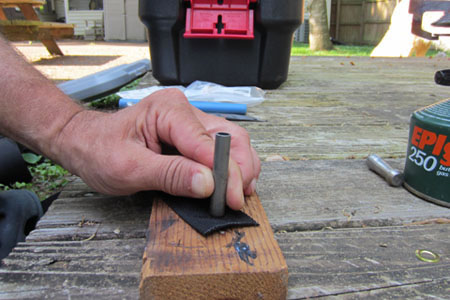
Plan B, I heated an old ice pick (or a long nail) on a camp stove and then used it to melt a hole in the nylon webbing. The depression made by the cutter indicated the location and size for the hole. Be careful, the ice pick was very hot and would burn a larger than needed hole in just seconds.
With a fairly round hole, I placed the grommet post through the hole and seated it against the material.
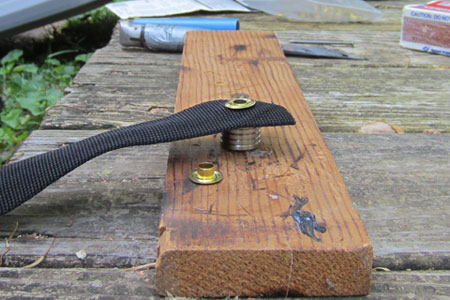
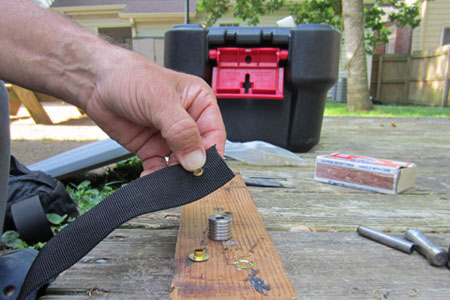
Next, I placed the grommet on the striker base. A washer fits on the top side of the post. Seat the grommet and washer against the material as flush as possible.
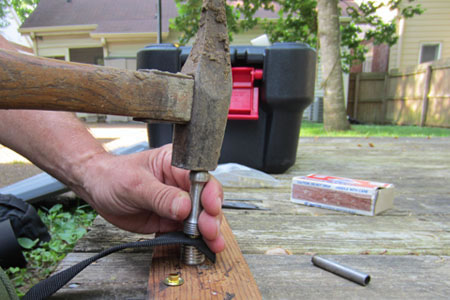
The insert handle goes into the grommet post's hole. Hit the insert handle a few times with a hammer, rotating the handle between hits.
That's it. We placed a grommet!
I picked up the webbing and looked at it with amazement. It didn't seem as if I had done anything, but the grommet was securely fastened to the material. It was magic.
I couldn't wait until Amy got home to show her my new skill. She too was surprised at how simple it was to place a grommet. Soon we were placing grommets everywhere. Try it, it is amazing.
A few grommet notes ...
The package says that it is important to wear safety goggles.
Making the hole in the material was the only tricky part of the procedure. If you are going to melt a hole, make sure you first, practice on a piece of scrap material similar to the material you plan to grommet. A hot object will go through nylon like a knife through butter. It could ruin a tent in just seconds. Be very careful. Make a pin hole and then enlarge it gradually.
Through thinner material the cutter would probably work.
We placed several grommets before we tried to place one in a real piece of gear.
Placing grommets is kind of fun, enjoy.
Happy grommet trails.